For the Stew
- 1 hen (about 2.5 lbs)
- 8 cups water (enough to cover chicken)
- 1/2 cup celery
- 1/2 cup scallions
- 2 tsp garlic salt
- 1⁄2 cup vegetable oil
- 2 lbs pork shoulder, with some fat remaining
- 1 lb ground beef
- 3 cloves garlic, minced
- 2 cups white onion, diced (about 2 medium onions, I used the already sliced from Trader Joe’s)
- 1 cup leeks, white and pale green portion only, thinly sliced (I used the frozen ones from Trader Joe’s)
- 1/2 cup green onions, thinly sliced
- 2 cups red bell, green and yellow peppers sliced (I used the frozen and sliced from Trader Joe’s)
- 1 can organic diced tomatoes
- 1⁄4 cup capers, finely diced
- 1⁄2 cup pimiento-stuffed olives, sliced
- 1⁄2 cup muscatel (Muscat) wine
- 1⁄2 tsp freshly ground black pepper
- 1/2 tsp lime juice
- 1/2 cup organic raisins
- 1 cup shredded papelon / piloncillo (sugar cane cones sold al Latin stores) dissolved in 1 cup water.
- 1 tbs worcestershire sauce
- 2 tsp salt
First, put the water and the hen in a large sauce pot. Bring it to a boil and add the celery, scallion and garlic salt. Cook for about 30 minutes at a medium heat.
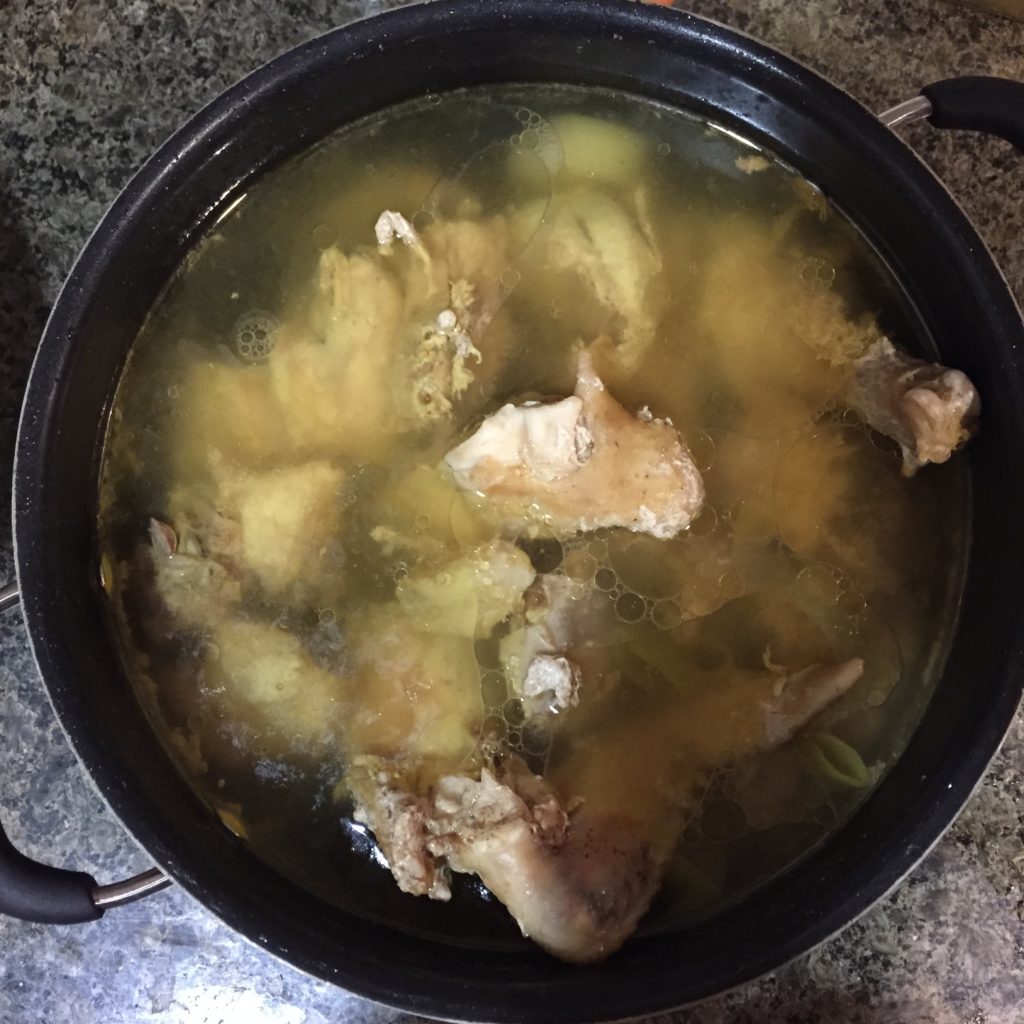
Transfer the hen to a plate and save stock. When the hen is at room temperature, pull the meat from the bones and shred it using your hands.
In a large sauce pot, heat oil and add the pork and ground beef to cook. Stir frequently until the has brown a little.
Reduce heat to medium-minimun and add more vegetable oil. Then, add the leeks, green onions, onions and garlic. Add 1 cup of the saved hen stock and stir frequently. Don’t let the vegetables go brown.
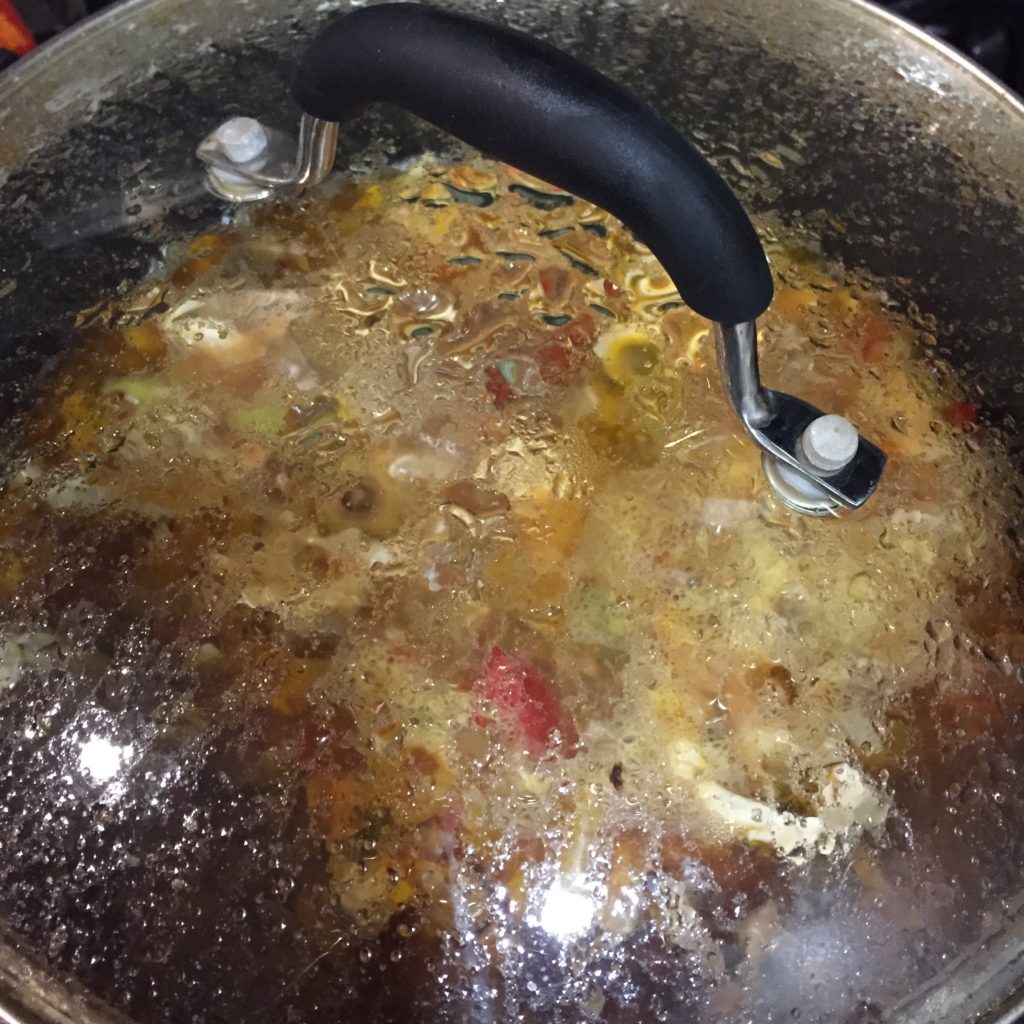
Add peppers, diced tomatoes and 1 more cup of the stock. Let it cook for 10 minutes at low heat.
Add the diced capers, olives, the papelon already dissolved in warm water, the organic raisins, sliced olives, muscat wine, worcestershire sauce, salt, pepper, lime juice and one more cup of the stock. Let it cook on low heat for 30 minutes stirring ocassionally.
Finally add the shredded hen. Let it cook for 30 more minutes, stirring occasionally.
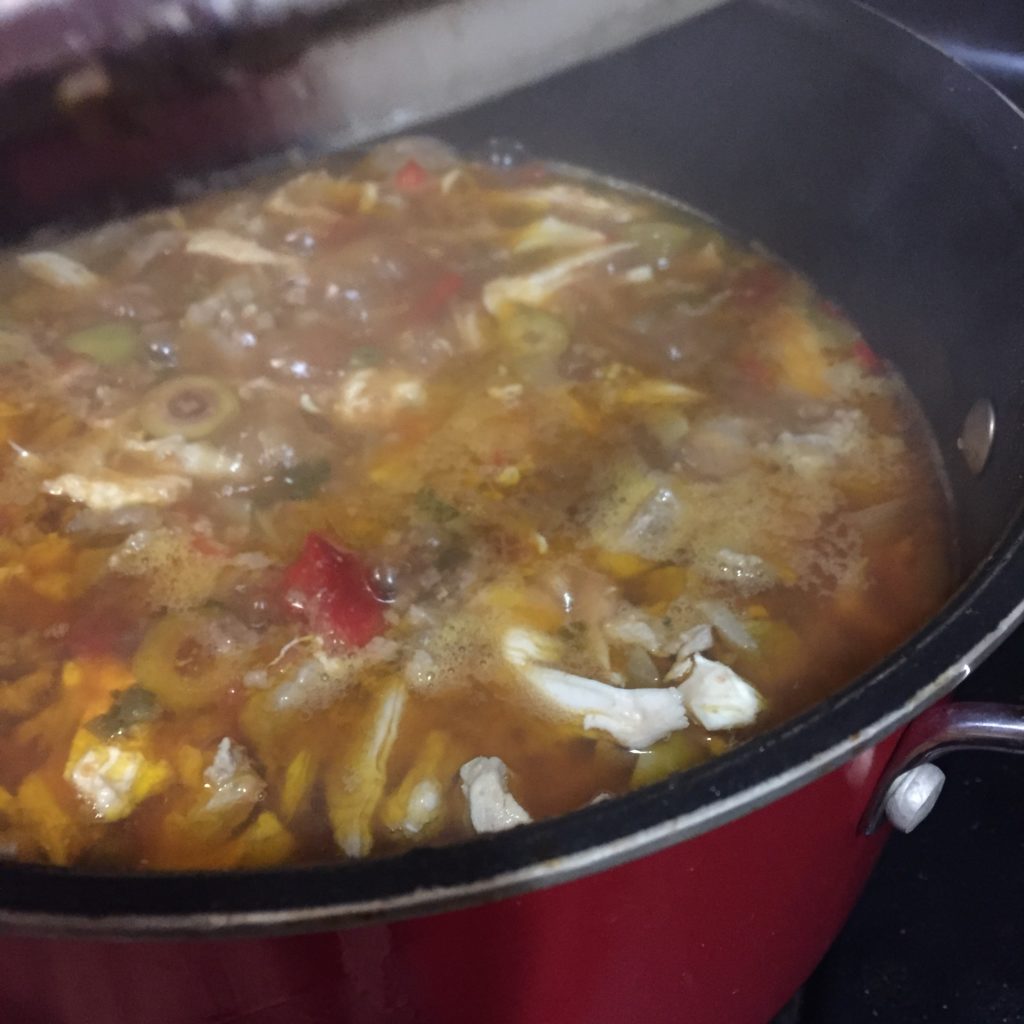
Remove from heat and let it covered until it’s cool. Refrigerate overnight until 2 hours before using it.
For the Dough:
- 1 package of Harina PAN (pre-cooked white corn flour, available at Latin grocery stores).
- 3 cups of hen stock
- 4 sticks of unsalted butter
- 3 tsp of achiote paste (available at Latin grocery stores)
- 1 tbsp salt
Place the achiote paste with the butter in a pan and warm it until they dissolve and create a reddish liquid. Set aside.
Using a large bowl, mix the flour and the salt. Slowly add 1 cup of the melted reddish butter to the flour and start mixing it. Then, add 1 cup of hen stock and continue kneading the dough. Repeat the steps adding fat and then the stock until you get a soft but firm consistency. The dough should be a dark yellow/orange color, smooth with no lumps.
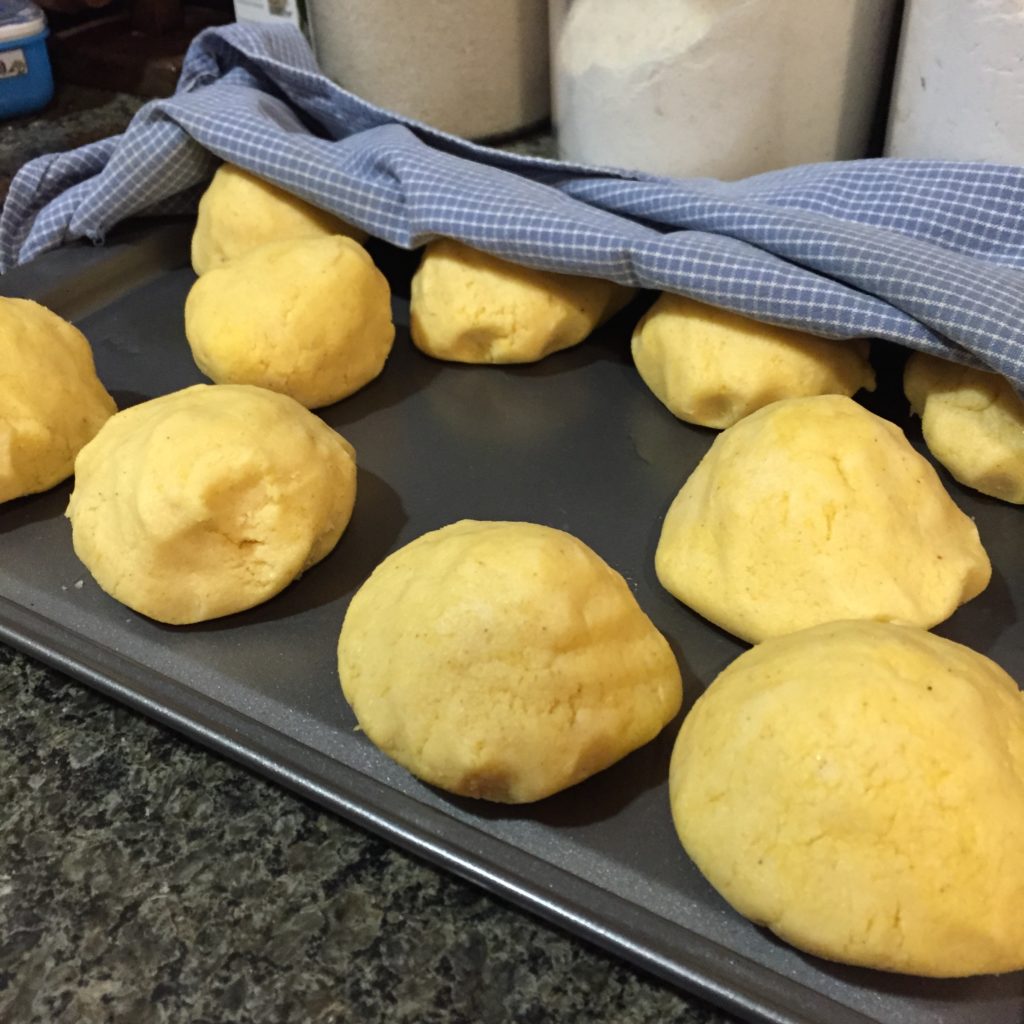
Make medium balls of the dough using and your hands, set aside and cover with a humid cloth. By the way, your hands should be very shiny from the fat used on the dough. If they are not, add more butter or shortening to the dough.
Wrapping:
- 2 packages of frozen plantain leaves (available at Latin grocery stores).
- 1/4 cup white vinegar
- 1 cup water
- 1 piece of clean kitchen cloth or papel towels
- cooking twine
The day before using the leaves, thraw the frozen package in the refrigerator overnight and leave it at room temperature 2 hours before cleaning them.
Use the the cloth or paper towel damped in the vinegar dissolved water to rapidly clean the leaves over the two sides. Set aside for the hallaca assembly.

Each hallaca uses 3 leaves. You should cut them prior to its use.
The first leaf -the base- should be about 10 x 14 inches. The second, also called the “shirt”, should be about 8 x 10 and the last one, called “belt”, should be about 4 x 6 inches. I’m not completely sure about this meassures, but they can work as an approximetely. I suggest you watch some videos to learn how to properly wrap the hallaca since I’m not and expert AT ALL in that matter (Victor is!).
Cut about 1 yard of twine for each hallaca. For this recipe you’ll need about 20 yards.
Assembly
You’ll need:
- stew (room temperature)
- 20 colored medium dough balls
- plantain leaves already cut
- 20 yards already cut cooking twine
- 3/4 cup colored butter (made with achiote paste and regular organic butter, like the one for the dough)
- garnish ingredients
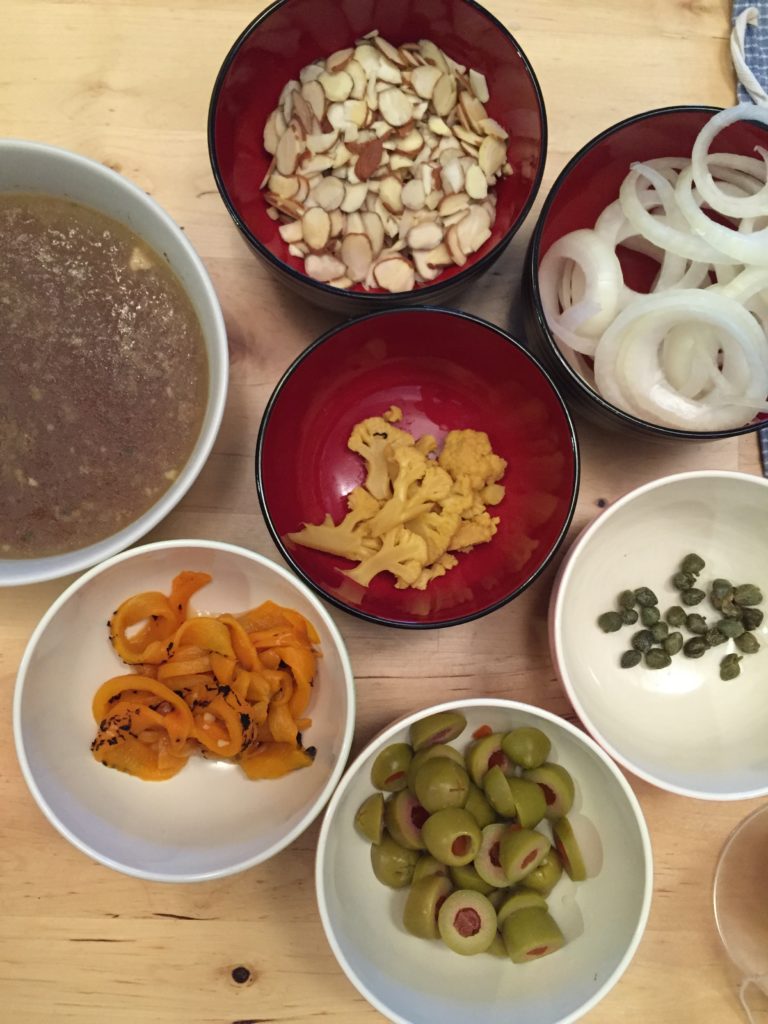
Garnish Ingredients
- 1 cup roasted peppers (sold in jars at Trader Joe’s)
- 2 medium sliced onions (in rings)
- 1 cup sliced olives
- 1/2 cup capers
- 1/2 cup organic raisins
- 1/2 whole or sliced raw almonds
- 1/4 cauliflower pickled style (this is optional, I just had this in my fridge and thought of adding it)
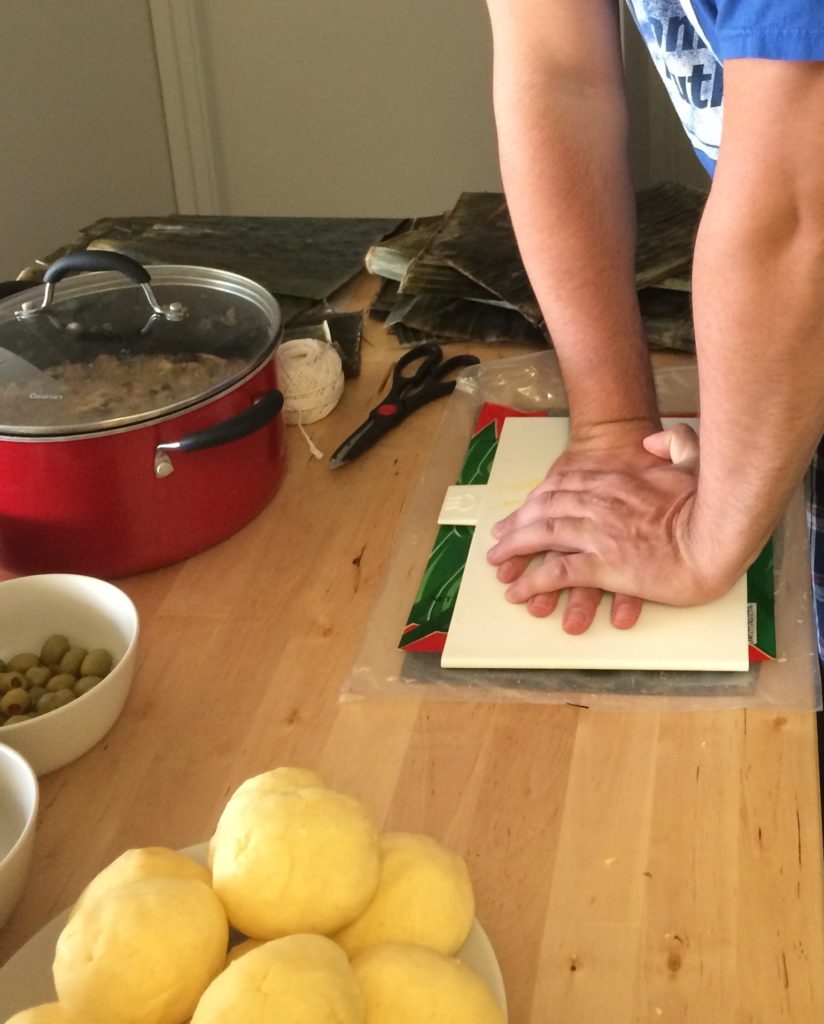
Prepare your mise en place -prepare and organize everything you’ll need- for the assembly.
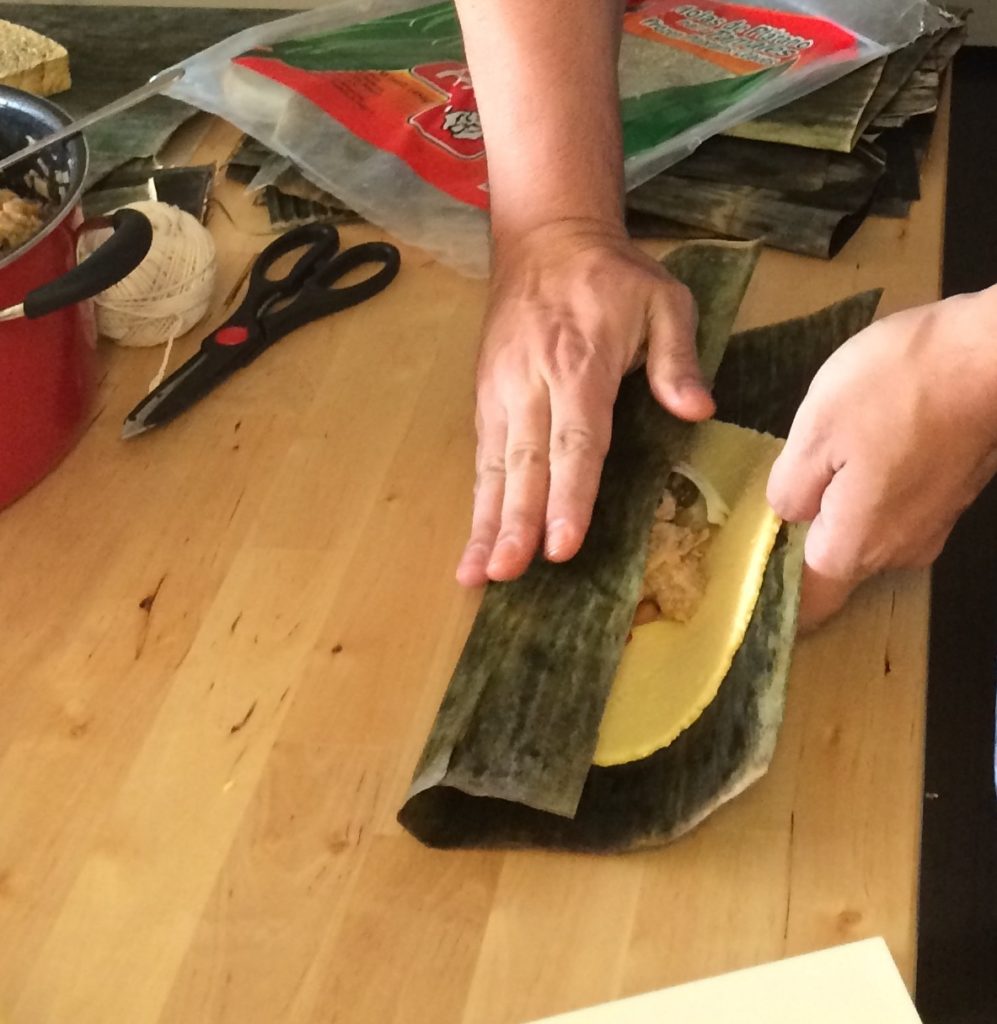
Arrange the base leaf and add 1/2 tsp of red-colored butter. Use your fingers or a cooking brush to spread it through the leaf.
Put a medium dough ball in the center of the leaf. Flatten the dough, we used a plastic cutting board for this process, covered with a piece of plastic bag so the dough doesn’t stick to the board.
Add 1/4 cup of the stew in the middle of the dough. Add the garnish ingredients.

Fold over the plantain leaf carefully so it doesn’t break, first one side, then the opposite. Finally bring the ends of the leaf up covering the filling.
Place the hallaca over the second square of the plantain leaf and fold it again. Finally use the third leaf (belt) to hold the two pieces of leaf under it, wrapping the hallaca around with it.
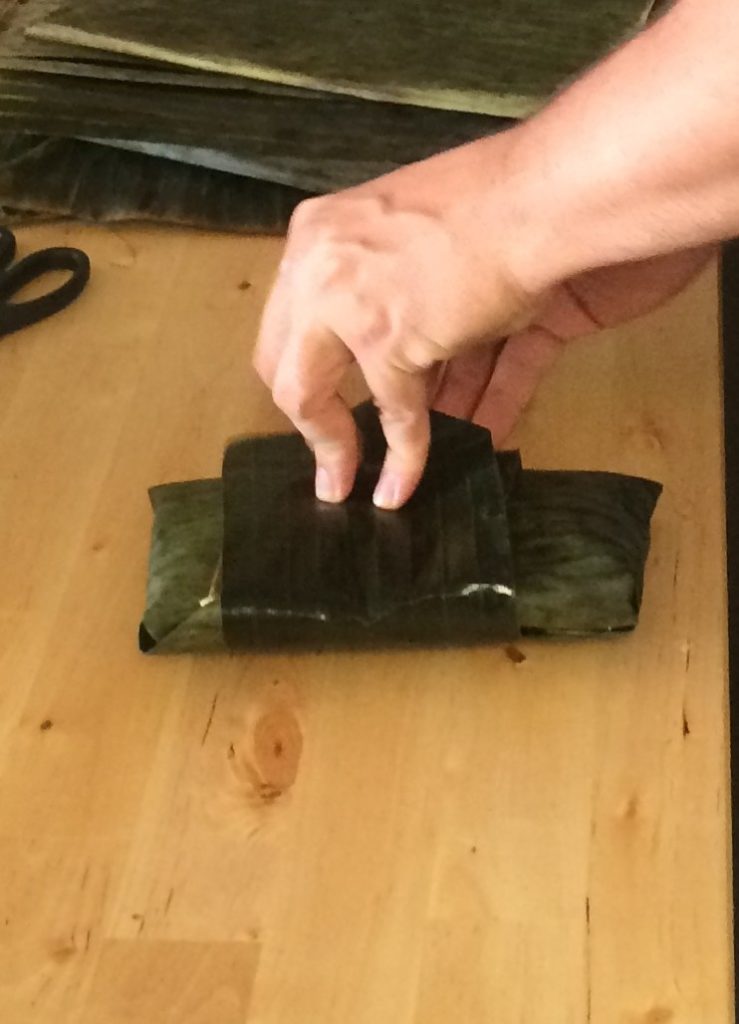
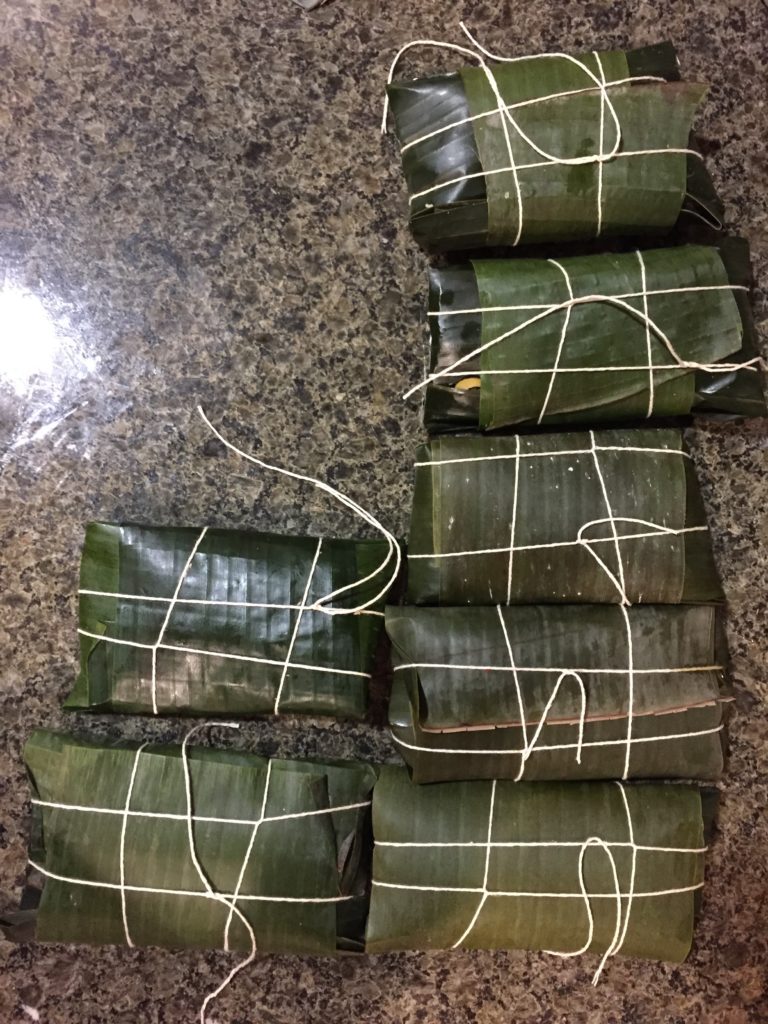
Tie the hallaca using the cooking twine to keep it secure during the cooking process.
Final process!
Bring water to a boil in large sauce pot. Place the hallacas in the pot, they must be covered by the water. Cook for 1.30h to low heat but keeping the water boiling, add more water if it needs it.
Remove it from the water and allow them to drain for 5 minutes standing on one of its sides over a plate.
If you want to freeze them, only cook them for 1 hour and then remove them from the water and let them cool down to freeze them. When you’d like to eat the hallacas, you’ll just need to cook them (frozen) for 30 more minutes. You cannot reheat them in the microwave.
Serving
Use kitchen scissors to remove the twine and the plantain leaves, remove them carefully. Serve immediately.
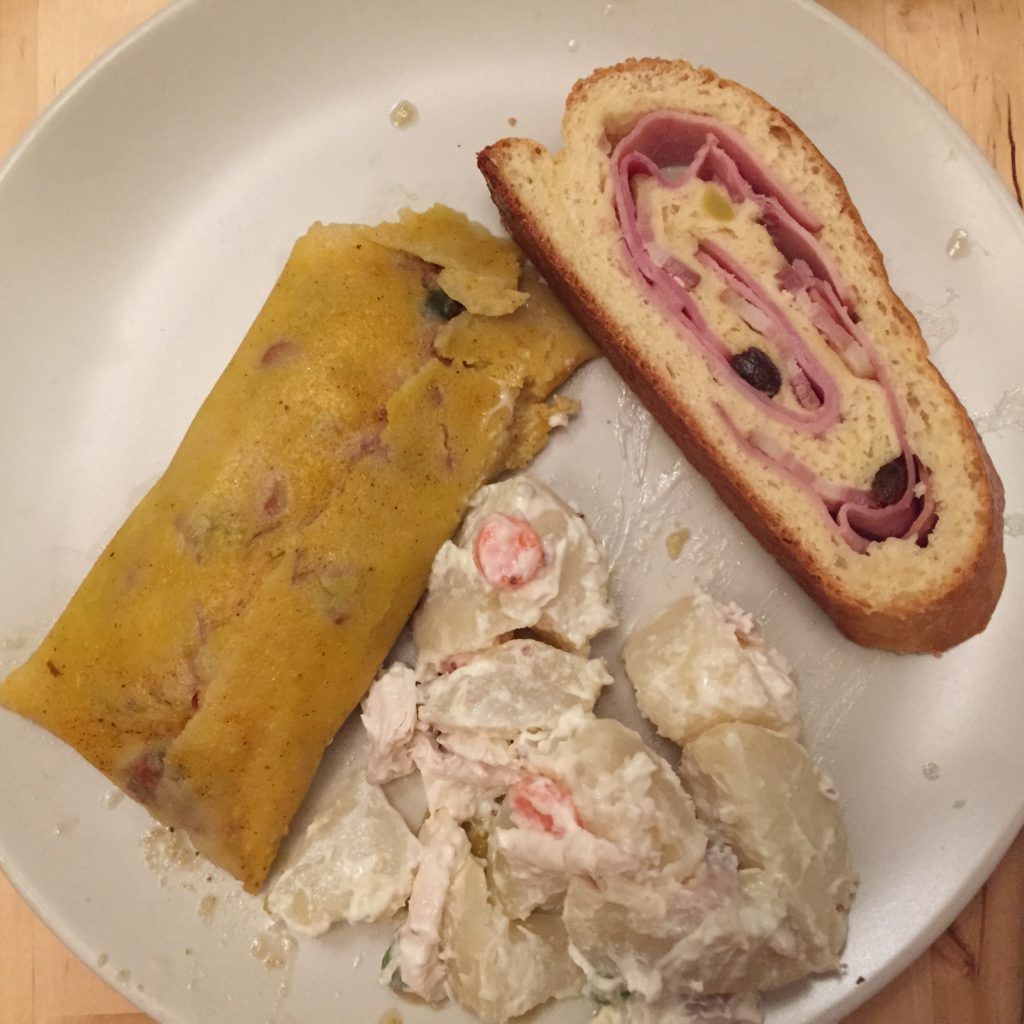
Our Christmas dinner: hallacas, pan de jamon (ham bread), and ensalada de gallina (hen salad).
Enjoy it!


 The cute animals collection makes me think of a nursery, sewing baby/toddler bed sheets with those fabrics and hang an art-print frame with a similar theme illustration on the wall. What do you think? In case you’re interested, I leave you