Hi friends!
I’m 36 weeks pregnant and the nesting syndrome has kicked in with all his power. I’ve been trying to finish a lot of projects that this baby inspired me but my energy is so low that is a bad combo having so many things to do with so little time and energy.
Anyway, as one of my favorite Lisa Congdon’s poster says, I had to begin anyhow.
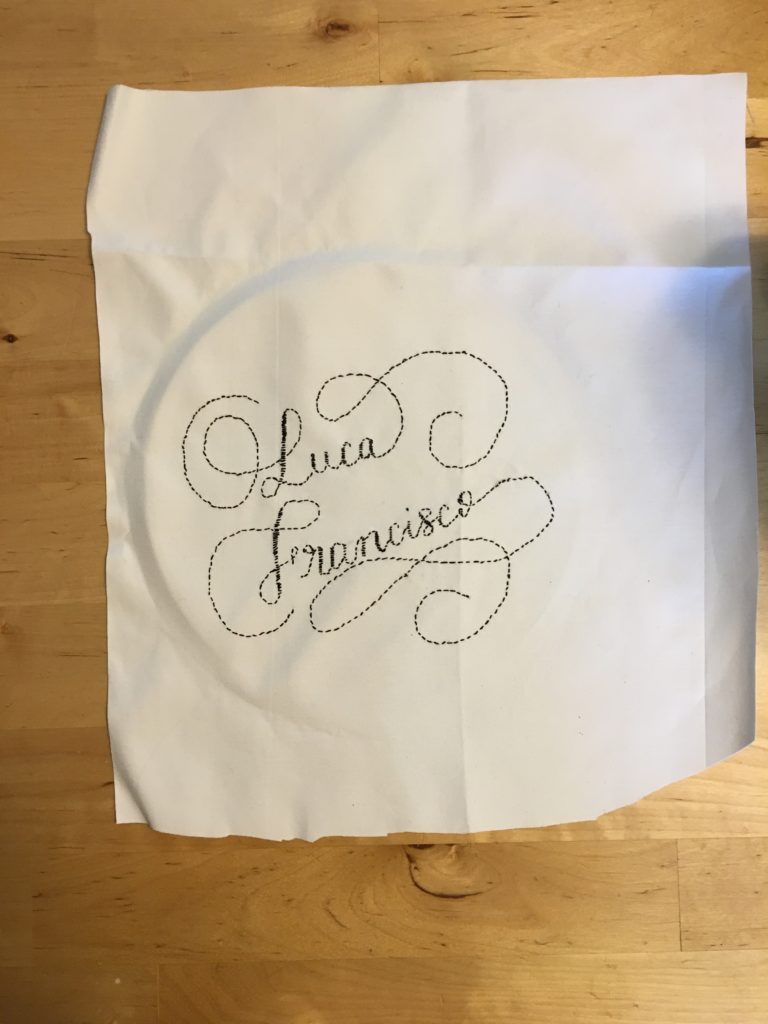
If you follow me on Instagram, you might already seen a few weeks ago that I posted this picture of the name of my baby that I wrote using my own Modern Calligraphy.
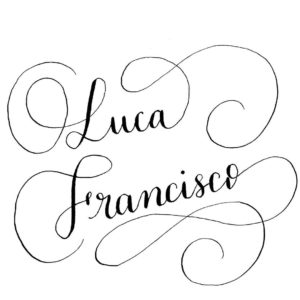
I wrote it using a Tachikawa T40 pen-holder and a Nikko G nib. After that and using a light pad, I traced over a piece of fabric the names using [amazon_textlink asin=’B002B55YD0′ text=’this pen’ template=’ProductLink’ store=’andreacasalsa-20′ marketplace=’US’ link_id=’0dee361f-21c1-11e8-8e83-734d209fddb2′].
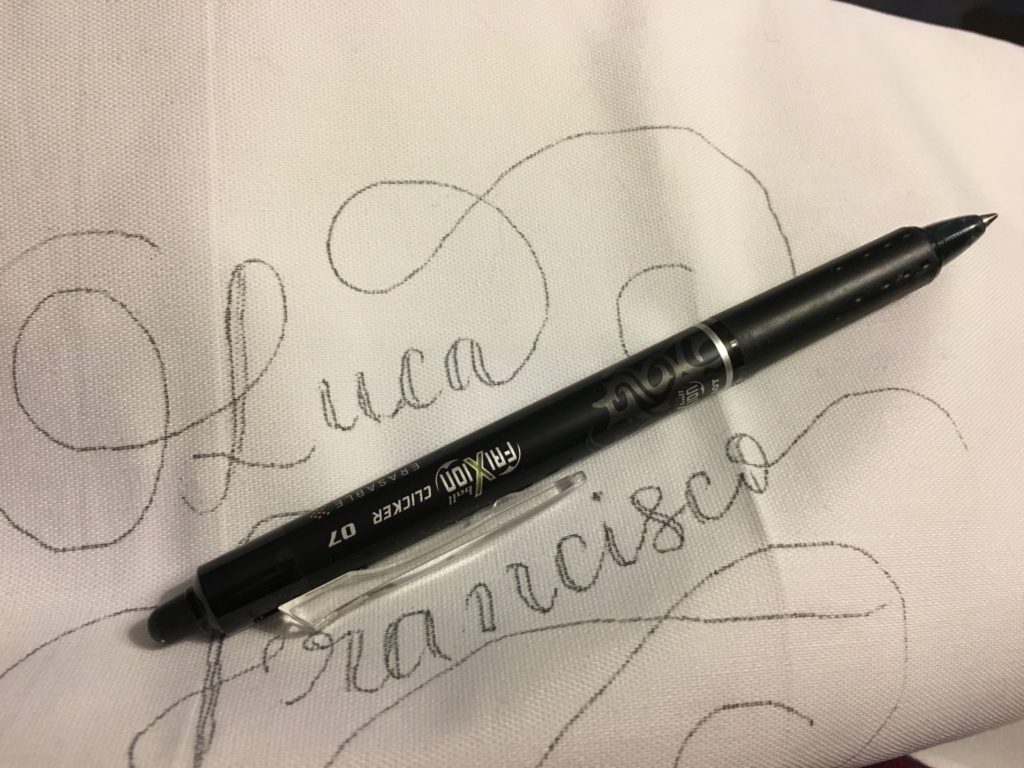
This pen is MAGICAL, I love it because it’s a gel pen with a fine point but its ink is erasable! Yes, you’re reading this! You can trace over fabric and then just use a warm iron over your illustration or lettering like in this case and it will disappear!
Now, let’s go to the second part. I used a 7 inches wooden embroidery hoop and some Singer black cotton thread.

Then, of course, the hard work started. I chose the very basic, simplest stitch since I didn’t want the stitch to take much attention from the composition of my lettering; it was also going to be faster (remember the first part of this blog post… I’m running out of time and my nesting syndrome is at full steam!) and finally… it has been a thousand years since the last time I did some embroidery! So, the simpler, the better.
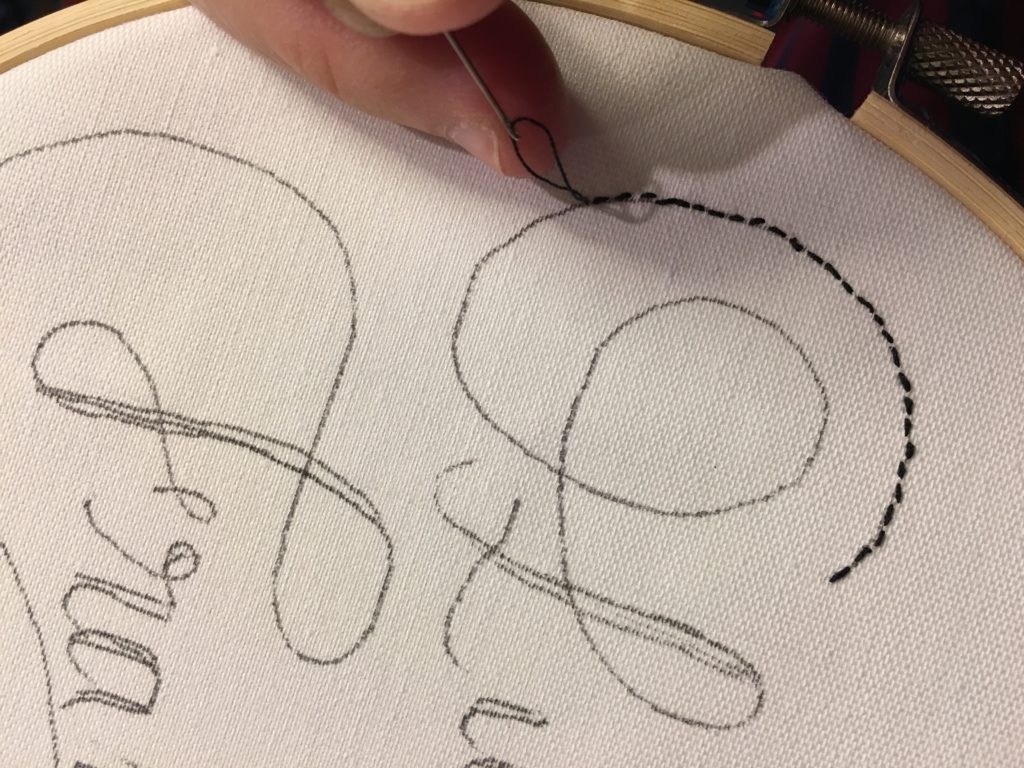
I used tighter stitches that were closer together to fill in the thicker lines.
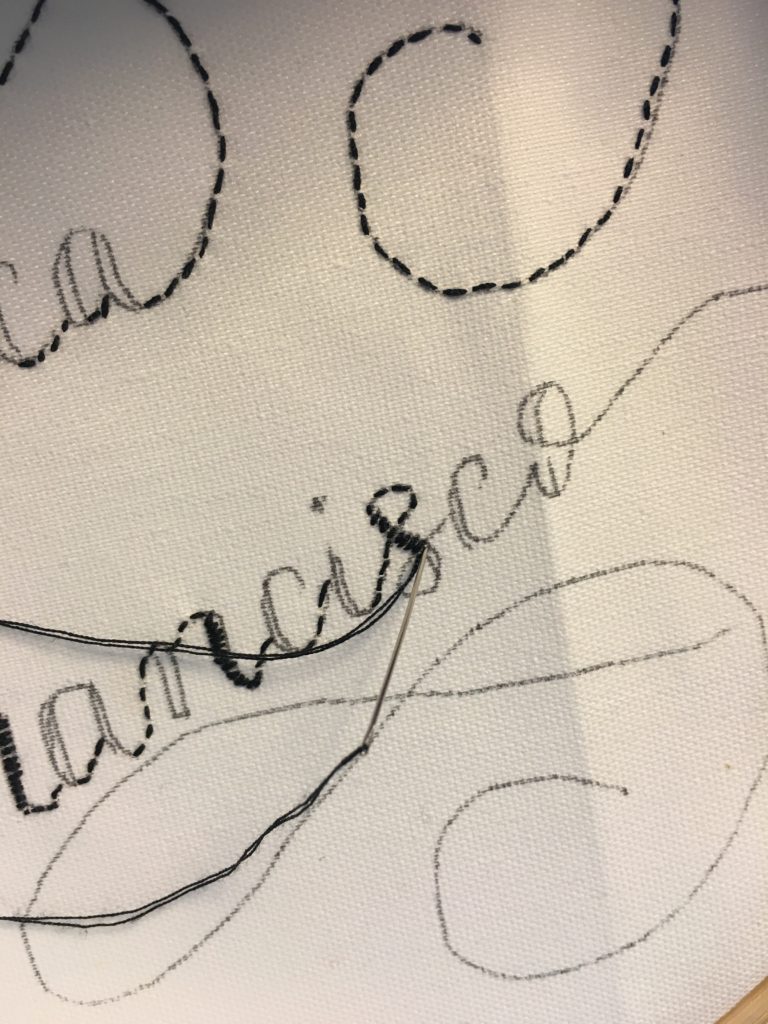
After I finished, I used a warm iron over my design to erase the lines of my pilot pen tracing.
Then, I put it back in the wooden embroidery hoop and cut a little bit of the extra fabric on the sides and hanged it on one of the walls of Luca’s nursery (which at the time is a little space in our bedroom).
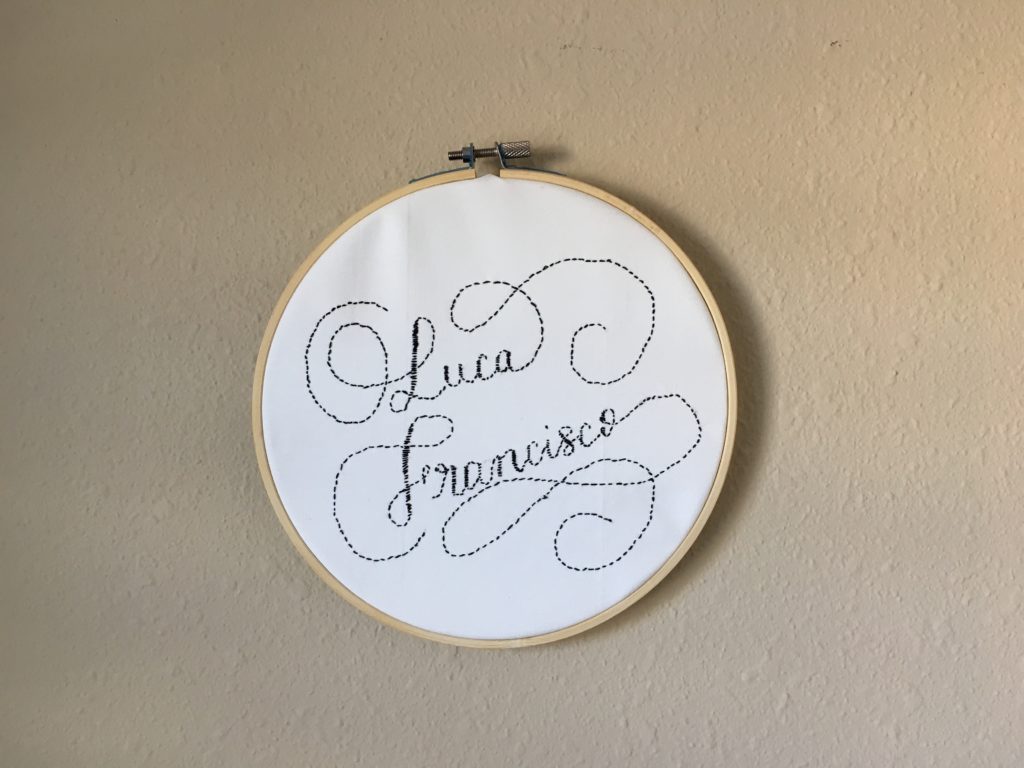
Of course I can see some imperfections here and there but still I’m very happy with the result, specially considering that I hadn’t done any embroidery since my Catholic elementary school years!
It was a nice project and it looks super cute on the wall next to the crib.
I hope the info about the erasable pen is useful for you too and let me know if you decide to try to transfer your hand-lettering or modern calligraphy designs to other surfaces and mediums, like fabric and embroidery. I’d love to know about it!
See you next week, friends!
One Reply
-
Pingback: Luca is here! – Andrea Casals
Comments are closed.